
;
No, I don’t think you’re all dummies.
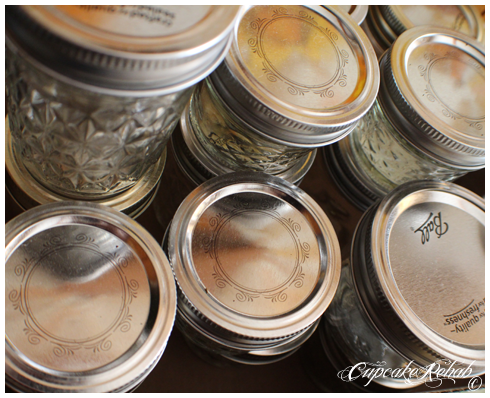
But I realize that for a lot of my readers, this is the closest they’ll get to a canning blog. Most of you are here for the cupcakes or baked goods, maybe even the macaroni & cheese or pizza, but that doesn’t mean you can’t expand your repertoire. Maybe you want to, but you just don’t know where to go to find info. Maybe you, too, were in a Williams-Sonoma store lately and saw those displays I photographed (below) and thought, “Hey… I’d really like to try it. But I don’t know how.” So I figured I’d do a kind of canning-summary post for newbies. Granted, I’m far FAR from being a pro. I am not a Master Preserver, I am not perfect and I sure as hell don’t know everything. But I’m not a professional baker, either, and that didn’t stop me from making some frosting tutorials a couple of years back. So I thought I’d do a brief outline of what you’ll need, what you’ll want, and some basics you’ll need to know before you get started with waterbath canning.*

;
Canning is not hard. Canning is not something you can only do if you have a lot of chemistry knowledge. Canning is a lot of fun, and if you do it right, it can save you money too. Although I do it just for fun, if you’re serious about it, you can put up just about anything & feed your family for an entire season using it all. However… it’s serious too. If you aren’t clean enough, and your jars aren’t sanitized enough, and you don’t wash your produce or follow safety procedures, you can expose yourself and anyone who eats what you make to things like botulism, listeria, e. coli or some very nasty yeasts, to name a few. But it’s not dangerous, it’s not scary, and it’s not something that should scare you. Why should you start canning? Well, there are tons of reasons. Some people, particularly those who eat only locally or sustainably, like to create their own products from local organic produce. People who live on farms or grow their own produce do it to avoid wasting the product & to sustain their families through the winter, just like in old times. Others still do it because they like to create unique “designer” jams or jellies or pickles… like me. Sure, you can probably buy a lemon-orange whiskey marmalade somewhere, at some gourmet shop most likely, but you’ll be paying far more for one small jar than I did per 4 pints. I made an amazing version of Brooklyn Brine Co’s Hop Pickles for way less than the $15.00 a jar they sell it for. And not only that, but food made from scratch just tastes better, and canning is no exception. No preservatives, no dye, no high fructose corn syrup. Just real ingredients. And price wise, if you’re buying the fruit or vegetables from a farmer’s market when it’s in season and not paying exorbitant prices, you’re still coming out on top price-wise vs. supermarket canned goods. I did the math for mint jelly last summer, but it’s easy enough to figure out any type of canned goods when you’ve got all the prices at hand.
I’m known as sort of a baking rebel, but when it comes to canning, DO NOT BE A REBEL. You can certainly come up with your own recipes, but they have to be acidic enough to be safe. Do your research first. Don’t play around with the health & safety of yourself and others. True, you never hear of people dying from improperly home-canned items. It’s pretty rare. But do you want to be that one asshole that makes it on the nightly news because of your jam?

;
Like I said above, this list of basics focuses on waterbath canning, NOT pressure canning* and not freezer jams.** Waterbath canning is the process most commonly used for high-acid foods: pickles, jams, jellies, preserves, fruit butters, conserves & marmalades. And I quote:
High acid foods are processed in a boiling-water canner. The heat is transferred to the product by the boiling water which completely surrounds the jar and two-piece cap. A temperature of 100° C (212° F) is reached and it must be maintained for the time specified. Always follow a modern recipe with proven and tested processing times.
This method is adequate to kill molds, yeasts, enzymes and some bacteria. This method never reaches the super-high temperatures needed to kill certain bacterial spores and their toxins, which can produce botulism, therefore, this method cannot be used for processing low-acid foods. See more about the Basic Steps for this method, or learn more about pressure canning and low acid foods.
Water bath canners are widely available. You can use any big pot, however, if it is deep enough for the water to cover the tops of jars by several inches. Allow 5 to 10cm (2 to 4 inches) above jar tops for brisk boiling. The canner must have a tight-fitting lid and a wire or wooden rack. The jars must be held off the bottom so the heat can penetrate properly. The jars are divided so they will not bump into each other or tip over in the boiling water during processing.
To ensure uniform processing of all jars with an electric range, the canner should be no more than four inches wider in diameter than the element on which it is heated. However for flat top stoves, canners should be no more than 2 inches wider than the diameter of the element.

;
First off, you need certain supplies. Like jars. You must use canning-safe jars- not old spaghetti sauce or applesauce jars (save those for refrigerator pickles & salsa). Ball® & Kerr® are the two most popular brands. Both are made in the U.S.A. and are fairly inexpensive. They’re both owned by Jarden Brands and the lids and bands are interchangeable. These jars are both the easiest to use and the easiest to find; you can get them at some Target stores, Ace Hardware, Walmart, and other hardware and home goods stores as well as the usual online ordering.
They come in the following shapes/sizes:
- Ball® – 64-ounce half-gallon wide mouth jar, 32-ounce regular mouth quart jar, 32-ounce wide mouth quart jar, 24-ounce pint & a half wide mouth jars, 16-ounce regular mouth pint jar, 16-ounce wide mouth pint jar, 12-ounce quilted crystal jelly jar, 8-ounce jelly half-pint jar, 8-ounce quilted crystal half-pint jelly jar, 4-ounce quilted crystal jelly jar.
- Ball® Collection Elite® – 16-ounce and 8-ounce jars in unique shapes.
- Kerr® – 32-ounce wide mouth quart jar, 32-ounce regular mouth quart jar, 16-ounce wide mouth pint jar, 16-ounce regular mouth pint jar, 12-ounce quilted crystal jar, 8-ounce wide mouth half-pint jar, 8-ounce regular mouth half-pint jar.
Unless you’re going to be doing some serious canning and/or you’re planning on making your own juice, or canning whole fruits, you probably won’t need a half gallon or quart jar. I have quarts for making sun tea or storing beans, grains, rice, etc. However they’re also really good for making pickles. If you eat a lot of pickles or want to make whole pickles (not sliced) then a quart jar is perfect. If you want to just make regular supermarket size jars of pickles, a pint jar will do. If you’re going to be focused more on jams or jellies, I’d recommend the 8 – or 4- ounce jars. All the jars come with lids & bands, but if you end up reusing the jars, you’ll need to buy more lids as they’re only made for one time use. The bands can be reused as long as they’re not rusted or crusty or they don’t impede with the sealing process.
(EDIT 9.7.12: Thanks to Susan Lutz at Zester Daily, there’s a new rundown of what jars are good for what products. Check it out!)

;
Walmart sells other jars as well, under the Golden Harvest name, the Alltrista1 name and the Mainstays name. Having never used any of them but Golden Harvest, I can’t speak of them from experience. However I do have a few quart Golden Harvest jars and they work just fine (I used Ball® brand lids/bands, I don’t trust the lids that come with them for canning). Quattro Stagioni is yet another canning jar option. They use a one-piece lid that can only be used one time for canning. I’ve never used this brand myself, but the jars are very attractive and there is something to be said for the one-piece lid. HOWEVER, they’re a bit expensive (around $3.95 per jar at the Container Store). Another jar option is Weck. Weck is a German company that makes fancier canning jars at higher prices. They’re beautiful looking, beautifully made, come in a variety of sizes and don’t use rings or bands like the Ball®/Kerr® jars do. They instead use a rubber ring, or gasket type thing, and a glass lid. Because these jar options are a bit trickier to use and also pricier, I’d recommend starting out with Ball® or Kerr®. And frankly in comparison, they’re just made to a better standard of quality than the Golden Harvest/Alltrista1/Mainstays jars, as far as I’m concerned. The Weck jars are also made very well, but far more expensive. For example, Weck is priced at $17.75 for six 19.6-ounce jars, whereas Ball is $12.99 for twelve 24-ounce jars.
And before I continue I have to say this: DO NOT USE VINTAGE OR SECONDHAND JARS FOR CANNING. For decoration, or storage, or even fridge pickles if you must… but never for canning. Those adorable blue vintage jars you bought at the thrift store? Keep them for their looks. Use brand new (or at least ones bought fairly recently, i.e. modern) jars. The old model jars are not recommended for safe canning any more, due to numerous reasons. Also, never use a jar with any kind of chips or cracks in it. It seems obvious, but you never know.

;
Second, you’ll need equipment to process the jars safely. I use a large stainless steel lobster pot and a cheapo plastic rack for processing my jars. There are tons of options here, from canning kits that include everything from the canning pot, a metal rack & jar lifter tongs to the simpler kits that just include a plastic canning rack and an instruction booklet that rely on you to get your own pot, tongs, etc. Then there’s the “elite” canning kit. I highly recommend you get a kit, regardless of what kind it is. It’s cheaper than buying things individually and there are certain things you just NEED. Like..
- A canning pot – this is just a necessity. Whether you buy a dedicated “canning pot” or use a very large pasta pot or lobster pot, if you’re canning you’re going to 100% need a pot to process them in. Ideally, when filled with water, there should be 1-2″ of it over the tops of your jars. And as I quoted above: To ensure uniform processing of all jars with an electric range, the canner should be no more than four inches wider in diameter than the element on which it is heated. However for flat top stoves, canners should be no more than 2 inches wider than the diameter of the element. This pot also needs a lid that fits.
- A large saucepan – for cooking the jellies, jams and brines. Ideally, it should be at least three times as deep as the mixture you’re cooking, so we’re talking about a fairly large pot. This is especially important for jams and jellies which bubble up a LOT and can boil over, which is obviously dangerous. For brine, unless you’re doing very large batches, a medium (or even small) saucepan will do.
- A canning rack – this is another absolutely necessity. The jars that are being processed cannot touch the bottom of your pot, they must be held off of it. Now, a lot of people just use some rolled up dish towels, and some people tie together canning rings to make a little homemade rack. Still others opt for the stainless steel racks, and like I said, I have a simple, small green plastic one that processes roughly four jars at a time. Which is great for me since I do small-batch canning. Whatever works for you.
- Jar lifter – the first time you can, you’ll think you won’t need this. Then you’ll either burn your hands or drop a hot jar using an oven mitt and you’ll see the error of your ways. So just buy one now.
- Jar funnel – Not an absolutely necessity, but it certainly makes things a hell of a lot easier. A jar funnel fits perfectly in the rims of your jars, filling them with boiling hot jam/jelly or pickle brine without spilling it all over.
- Tea towels or linen dish towels – this is something that you’ll need for after you remove the jars from the boiling water. The hot jars shouldn’t touch a cold countertop, particularly if you have a granite or stone counter. So you fold up one or two very light, not textured linen towels for them to sit on. It absorbs the temperature and it’s soft. If the hot jars touch a cold counter, they could crack or shatter immediately. Now, I’ve never had this happen, and I’ve sometimes been a bit rushed or lazy (I hate to admit), but it can and it does… so please be aware. Don’t take the chance. I stock up on these linen towels at Ikea every time I go. For around $.79 cents each, they’re worth their weight in gold. I use them for not just canning, but for everything! When they get too grungy, I toss ’em. (Side note: I barely use paper towels anymore!)
- Jelly bag – if you’re going to venture into jellies (and by that I mean fruit jellies, not things like wine jelly or tea jelly), you’re going to need a jelly bag. You can buy a jelly bag contraption, or you can rig one up using cheesecloth/jelly bags and either your faucet (if it’s a gooseneck) or something else. But you’ll definitely need it- especially if you want clear jelly.
- Commercial pectin or homemade apple pectin – Commercial pectin comes in many different kinds. There’s liquid pectin (ex: Certo), powdered pectin (ex: Ball Flex batch/ Small batch and Sure-Jell) and powdered pectin that uses calcium water to gel (Pomona’s). Each pectin needs a different amount of sugar & acid to set, and they are NOT interchangeable. Pomona’s Universal Pectin can be used with full sugar jams & jellies and also with low-sugar or even NO sugar. Ball also makes a low-sugar powdered pectin. All pectin is made from natural fruit pectin, so they aren’t in any way “fake” at all, but still, if you choose to go au naturel & use something homemade, there are ways of making your own pectin. I have a recipe for homemade apple pectin here. There are tons of different kinds, and they all work very well. I’ve used every single one at one point or another and I’ve never had an issue. For clear jelly, I like liquid Certo. For jams I don’t mind using a powdered one, usually Sure-Jell. But I’ve used Pomona’s too, and it wasn’t as complicated as it seemed. All in all, it’s about personal preference. Try them all & see which works for you.
- Candy thermometer – if you’re making jelly, this is another requirement. They can be purchased in any supermarket, Bed Bath & Beyond store, online or at any housewares store for pretty cheap. And remember, if you buy a glass one, they’re delicate and they retain the heat like crazy. I dropped mine after trying to grab it while it was still hot when I was making champagne jelly last New Year’s and ended up with no thermometer & shards of glass all over the damn floor. That is something you do NOT want to happen to you, it really ruins the mood of the jelly-making.
- Pickling salt – this isn’t a necessity, meaning you can still pickle with Iodized salt or un-Iodized salt. But most recipes will probably call for pickling salt. Basically, it’s just a finer grain of salt that has no Iodine mixed in it, so you can use regular un-Iodized salt if you like. It works just fine and that’s mostly what I use. Iodized salt might make your brine cloudy. It most likely won’t affect the taste or quality, but it won’t look as nice.
- Vinegar – the most basic and obvious of all, along with salt. You need this for pickles; be they “fridge” pickles (or quick pickles) or actual “canned” pickles. The type might vary. For starters, get a gallon of white vinegar, and a smaller bottle of apple cider vinegar, both MUST BE 5% acidity. After that, it’s basically all a matter of taste. You might want to try an Asian-inspired pickle and use rice wine vinegar. You might want a red wine vinegar pickle. Those are all just fine. But the most basic vinegars you’ll need are white and apple cider. And any recipe that is canned using a waterbath canner must use a vinegar with 5% acidity. No less. Any vinegars less than 5% can be used for fridge pickles, but not shelf-stable pickles.
- Lemon juice – I always have at least one bottle of lemon juice in my fridge. You need it for providing the acid in a lot of jam or jelly recipes. Some people prefer to use only fresh lemon juice, but I like to use the bottled stuff for most things. Some exceptions include lemon curd & lemon jellies.

;
The rest of the stuff: sugar, spices, etc., is all dependent on the recipe/pectin you decide to use. And what is pectin, exactly?
Pectin is a naturally-occurring thickening agent that is most often used by adding it to jams, jellies and similar products to help them gel and thicken. Pectin creates a thick, clear set when it gels. It is a carbohydrate (a polysaccharide) found in and around the cell walls of plants, and helps to bind those cells together. All fruit has pectin in it, but the amount varies widely. Apples and oranges contain the most pectin, and the pectin from both fruits is used commercially to thicken many different types of products. Pectin generally needs a high sugar content and some acid, such as citric acid, to activate, and some commercially available pectins include citric acid as an ingredient to help ensure that consumers get their desired result when working with their products. Pectin can be bought at the grocery store in both powder and liquid forms, and it can also be introduced to a recipe by adding fruit that has a high natural pectin content, such as apples or plums.
Gelatin and pectin both produce clear gels with a high sheen, but the products are not the same. Pectin is a water-soluble fiber, while gelatin is a protein derived from animals. Pectin is used almost exclusively in high-sugar products, like jams. Gelatin, on the other hand, is used in a much wider variety of foods, including mousses, marshmallows and frostings because gelatin sets in a cool environment and does not require that specific ingredients be included to activate it.
Like I said, what kind of pectin you use: homemade, commercial, liquid, powdered, etc., influences how much sugar (or what kind of “sweetener”) that you’ll be needing, which is in turn all dependent on either your dietary needs/wants or the recipe you’re using. Which brings me to the Three R’s.
When it comes to The Three R’s: research, resources and recipes (three very important things), you have to know where to go. There are a number of amazing canning blogs and websites out there jam-packed (pun intended) with amazing information. But how do you find them? Well, right here! These are seven of my favorite and most trusted sites when it comes to preserving (and some of them have other stuff, too, like cooking or grilling). The first is an official website for the USDA, the second one is a website that’s instructional on all the basic canning steps & info (and has information on where you can pick your own veggies & fruits) and the third is a similar site, and the fourth one is a community of canners/preservers all sharing their knowledge. However, the last four are user-friendly blogs. Bookmark them. Now.
- National Center for Home Food Preservation
- Pick Your Own/Canning
- Miss Vickie/Canning
- Punk Domestics
- The Practical Preserver
- Well Preserved
- Food In Jars
- Hungry Tigress
You’ll also need a few books. Websites are great, yes, and there are tons of them that can help you with questions you have. But a book will always be there for reference. I recommend the following books: The Ball Complete Book of Home Preserving by Judy Kingry & Lauren Devine, Better Homes & Gardens You Can Can, We Sure Can! by Sarah B. Hood, and Canning For a New Generation by Liana Krissoff. The first two are basic guides, with the most commonly used and requested recipes for jams, jellies, pickles, chutneys & more, along with detailed drawings & explanations as to why certain procedures are done, why certain things are not waterbath-canner safe, etc. The second two books are filled with such things as homemade pectin recipes and recipes for more unusual or unique jams, jellies & pickles. Altogether they’re a compact yet excellent little collection of canning books that cover everything you need to know, from the very basic to the more exotic.
In my humble opinion, pickles are the easiest to make. I’d definitely start with pickles, either pickled cucumbers or pickled green beans (“Dilly beans”; shown in the top photo) or pickled vegetables like Giardiniera. Then I’d say jams would be the next easiest, specifically blueberry, raspberry or strawberry jam. Blackberry too, but the fact that you might want to use a food mill to get rid of the seeds makes it a bit more tedious than the others (I never ever do that, by the way). None of them require much work, though, not even any added commercial pectin. Next easiest? I’d say marmalade; either orange, lemon or a combination of the two. It’s a longer process then jam but it, too, doesn’t require added pectin. Some people have a difficult time getting it to set, but I personally never have, and my whole philosophy is “nothing ventured, nothing gained.” You never know until you try, right? And then last, but not least, jelly. Jelly is the hardest because it requires added pectin, and also it requires a candy thermometer and a very specific degree that it has to be cooked at before it will set. Now, technically speaking, all jam & marmalade has to be cooked to that degree, or “setting point” as well, but it’s easier to “see” when jams/marmalades/preserves are at the setting point. Jelly is a bit harder since it stays mostly liquid until it cools. Not only that, but you need patience and even then it can be tricky. It’s not something to be scared of, but to me it’s the most difficult of all the waterbath canned products.

;
Canning, like baking or cooking, is fun. But it’s also work. It’s an art and a science. It’s important, just as in baking, to understand the different chemistry that makes things work the way they do before attempting to do it. If you don’t understand why you need baking powder & salt, then you shouldn’t bake; or at least you shouldn’t consider yourself a “baker.” And if you don’t understand why you need lemon juice to make your commercial pectin work, then you shouldn’t be canning. You don’t need to be a master chemist or science major, you don’t need to have a pH kit or massive knowledge of the acidity of every fruit or vegetable on the face of the earth. All you need is curiosity, and the basic knowledge of why you have to do certain things to make it work. At the very least, you should be open to learning the reasons why things are the way they are. Once you’ve got that- you’re on your way.
The acidity level, or pH, of foods determines whether they should be processed in a boiling water canner or pressure canner. The lower the pH, the more acidic the food.
Acidic foods have pH values below 4.6. These foods include pickles, most fruits, and jams and jellies made from fruit. (In pickling, the acid level is increased by adding lemon juice, citric acid, or vinegar.) Acidic foods contain enough acidity either to stop the growth of botulinum bacteria or destroy the bacteria more rapidly when heated. Acidic foods may be safely canned in a boiling water canner.
Low-acid foods include red meats, seafood, poultry, milk, all fresh vegetables and some tomatoes. Low-acid foods have pH values higher than 4.6. They do not contain enough acid to prevent the growth of botulinum bacteria. These foods are processed at temperatures of 240 degrees F to 250 degrees F, attainable with pressure canners operated at 10 to 15 pounds per square inch (psi) of pressure. The exact time depends on the kind of food being canned, the way it is packed in jars, and the size of jars.
Although tomatoes used to be considered an acidic food, some are now known to have pH values slightly above 4.6, which means they are low acid. To safely can them as acidic foods in a boiling water canner, you must add lemon juice or citric acid.
Pressure canning is the only canning method recommended for low-acid foods like meat, poultry, seafood and vegetables.
Clostridium botulinum, the bacterium that causes botulism food poisoning, is destroyed in low-acid foods when they are processed at the correct time and temperature in pressure canners. Canning low acid foods in boiling-water canners is absolutely unsafe because the botulinum bacteria can survive this process. If Clostridium botulinum bacteria survive and grow inside a sealed jar of food, they can produce a deadly toxin. Just a tiny taste of food containing this toxin can be fatal.
Before I wrap this up, I’m going to really quickly cover refrigerator pickles. It’s not technically “canning” per se, but if you’re unsure/scared about starting the real canning process, you could try making some “quick pickles” or fridge pickles & see how you like it. The upside for most people to fridge pickles, aside from the fact that they’re super quick to make, is that it requires no canning pot, no canning jars/lids, no jar lifter, and no canning knowledge whatsoever. You can use any clean, food-safe glass jar that you want; from a clean spaghetti sauce jar, to a mayonnaise jar, to an applesauce jar, even a pickle jar. Or, a regular old canning jar! Anything. And you can “pickle” anything you want this way. You can make regular cucumber pickles, pickled green beans, pickled cauliflower, pickled okra, Vietnamese pickles, pickled carrots, pickled onions… the list goes on. The downside? Not shelf-stable, meaning they have to be stored in the fridge at all times. Also, they should be thrown out after 6 months in there, tops. Confession: I have some in my fridge for longer that are just fine, but I’m a loner Dottie… a rebel.
All you do is clean and chop or cut up your veggies, pack them into a jar, add your spices or herbs of choice, heat up some brine (usually a combination of vinegar/salt/water but sometimes there’s no vinegar, as in the Kosher Dill’s I list below) and then pour the brine over the veggies. Close the lid (not too tight!) and put them in the refrigerator. That’s all.

;
Just like canned pickles, you can make fridge pickles with fresh dill and/or herbs, or you can use dill seed and/or dried herbs & seeds, as you can see above. I have a few recipes for fridge pickles up on the blog, one of which is taken from Hip Girl’s Guide to Homemaking‘s basic fridge pickle recipe, & I’m going to list them below. I encourage you to give it a shot, it’s very easy and it’ll give you a taste of what canning pickles is like without actually having to can them.
- 24-hour fridge pickles
- Basic fridge pickles
- Spicy pickled carrots
- Arthur Schwartz’s Kosher Dill pickles
- Pickled red onions
- Pickles made with red wine vinegar
- Hot Habanero pickles
- Chive vinegar pickles
- Asian quick pickles
For preserving summer produce without canning at all, visit this page at The Kitchn. a complete list of the jams/jellies/preserves/pickles I have posted, see the recipe index. Or just search the categories, below. Either way- go forth & can! That way, little brunches & lunches like this can be an every day occurrence.

;
P.S. Do you have any questions? Leave them in the comments, and I’ll do my best to answer them, or refer you somewhere else. And did I forget anything? Did I leave something out? Is there a book or website you think people should know about? Add it in the comments! All input, big or small, is graciously & gratefully accepted.
;
;
*None of this references pressure canning, which is primarily used for low-acid foods (potatoes, soups, meats, etc). If you’re interested in that, please visit this page.
** For more freezer jam information, please visit this page.

 I'm Marilla. A 30-something artist, hobby baker, home canning enthusiast, gardener, DIY-er, wife, mommy of a baby boy and dog mom (to another baby boy) from New York.


Hooray for canning! It does seem intimidating at first–but once you get into the swing of things, canning is actually pretty easy, and definitely rewarding. 🙂 Thanks for the great in-depth tutorial!
Exactly, Eileen! Canning is very easy once you get into it. It seemed so intimidating to me at first, I was hesitant to try it. But now it’s just like second nature. I could do it with my eyes closed! Well.. maybe not. But close enough 🙂
Thanks for putting this together. I’ve been wanting to get into canning for awhile now (I have plenty of canning jars for it, lol), so this is a great start.
You’re so welcome 🙂 I hope it helps!
A VERY insightful and informative Blog Post about canning!…..Good Job making it easy to understand!
Thank you Mara 😀
Some newer websites and blogs call for using fresh lemon juice in canning. DO NOT use fresh lemon juice! The acidity varies between crops, seasons, and individual lemons while the bottled stuff maintains a standard level of acidity. This is important for creating the acidic, anti- microbial enviornment needed for food safety, and not murdering friends and family with jam. Great job on the safety aspect!
Thanks Candy! I’m fairly new to it & nowhere near an expert, but I did my best to pass along the best information I could.
Hi My name is Val I totally love your blog. Read it every day! I’m hoping to one day have my own bakery business….(all in the works) but I’m newly obsessed with canning….So I made a batch of cinnamon peach jam and did something wrong and it didn’t set right…I know how to reset it but I kinda made it 3 weeks ago and I’ve just been lazy. Is it too late to reset it??? I’m hoping you know the answer cause google doesn’t! Keep up the awesome blogging!!! btw its awesome your from newyork! I’m born and raised here! awesome city and theres cupcakes EVERYWHERE.
Hi Val!
Thank you SO MUCH for reading the blog every day! And also thanks for all the sweet compliments about the blog, it makes me really happy to read stuff like that. Especially from a fellow New Yorker!
As far as your cinnamon peach jam (which sounds delicious), you have two options. One, you can open it & re-cook it, meanwhile cleaning and re-sterilizing your jars, and then re-can it all over again with new lids. Or two, you can use it as a cinnamon peach sauce on pound cake or bundt cake, a cinnamon peach ice cream topping, a cinnamon peach glaze for chicken or pork, etc, etc. It happens sometimes. I don’t know if you ever saw my canning mistake, but just in case you didn’t it’s here: http://cupcakerehab.com/2011/10/caramel-apple-syrup-that-wasnt-supposed-to-be-syrup/
If you do decide to re-cook it, and you don’t have a candy thermometer, I’d suggest getting one. They really help you find that “set point” that’s so important. The frozen plate test doesn’t always give you an accurate reading (it rarely works for me at all). Also, if you aren’t using commercial pectin, maybe a dash of it might help you for next time. Sometimes peaches need a little pectin boost to get them to gel.
Good luck & let me know how it goes!
thank you!!! What temp dos it have to reach on the candy thermometer? I always do the freezer text and sometimes it really sucks. I could use it as a syrup but i have sooooo many jars of it lol the peaches were amazing because they were from a fruit market in P.A…cant wait to fix em! thx for getting back to me! ill comment more often! =]
It has to reach 220 degrees F in order to set properly. Once it reaches 220, then you can try the freezer test or the spoon test, but it has to reach 220 degrees to set. Some jams/jellies have to be cooked a while at 220, others are done almost as soon as they reach it.
You’re welcome!
I have been surfing online more than three
hours today, yet I never found any interesting article like yours.
It’s pretty worth enough for me. In my opinion, if all website owners and bloggers made good content as you did, the net will be much more useful than ever before.
Excellent items from you, man. I have have in mind your stuff prior
to and you are simply too wonderful. I actually like what you have obtained here, really like what you’re
saying and the way by which you are saying it.
You’re making it enjoyable and you continue to take care of to stay it wise.
I can not wait to read far more from you. This is really a terrific web site.
I always emailed this website post page to all my contacts, for the reason that if like to read
it after that my links will too.
Hi, I do think this is a great blog. I stumbledupon it 😉 I will revisit once again since i have bookmarked it.
Money and freedom is the best way to change, may you be rich and continue to help
other people.
Wow, awesome weblog layout! How lengthy have you
ever been blogging for? you made running a blog look easy.
The total look of your website is great, let alone the content!
I’m truly enjoying the design and layout of your website.
It’s a very easy on the eyes which makes it much more pleasant for me to come here and
visit more often. Did you hire out a designer to create your theme?
Outstanding work!
Hey! I’m at work browsing your blog from my new iphone
4! Just wanted to say I love reading through your blog and
look forward to all your posts! Carry on the outstanding work!
Truly no matter if someone doesn’t know then its up to other visitors that they
will assist, so here it occurs.
You are so awesome! I do not suppose I’ve read through anything like that
before. So great to discover somebody with some unique thoughts
on this subject. Really.. thanks for starting this up.
This site is something that is needed on the web,
someone with some originality!
Hi, I log on to your new stuff on a regular basis. Your story-telling style
is awesome, keep doing what you’re doing!
I’ve been browsing online more than 3 hours as of
late, yet I never found any interesting article like yours.
It’s lovely value enough for me. In my view, if all site owners and bloggers made excellent content
material as you did, the internet shall be much more useful than ever before.
You made some decent points there. I checked on the web for additional information about the issue and found most individuals will go along with your views on this website.
Very energetic post, I loved that a lot. Will there be a part
2?
Hi! This is my first visit to your blog! We are a collection of volunteers and starting a new initiative
in a community in the same niche. Your blog provided us valuable information to work
on. You have done a wonderful job!
Hello friends, how is all, and what you desire to say concerning this piece of writing, in my view its in fact remarkable designed for me.
I’m amazed, I must say. Rarely do I come across a blog that’s both educative and engaging, and without a doubt, you have
hit the nail on the head. The issue is something that not enough folks are speaking intelligently about.
Now i’m very happy I came across this in my hunt
for something regarding this.
I’ve been surfing online more than 4 hours today, yet I never found any interesting article like yours.
It is pretty worth enough for me. In my opinion, if
all web owners and bloggers made good content as you did, the internet will be much more useful than ever before.
I am regular visitor, how are you everybody? This paragraph
posted at this web page is truly fastidious.
Zune and iPod: Most people compare the Zune to the Touch, but after seeing how slim and surprisingly small and light it is, I consider it to be a rather unique hybrid that combines qualities of both the Touch and the Nano. It’s very colorful and lovely OLED screen is slightly smaller than the touch screen, but the player itself feels quite a bit smaller and lighter. It weighs about 2/3 as much, and is noticeably smaller in width and height, while being just a hair thicker.
I always used to read article in news papers but now as I
am a user of web so from now I am using net for posts, thanks to web.
Oh my goodness! Incredible article dude! Thanks, However I am experiencing troubles with your RSS.
I don’t understand the reason why I am unable to subscribe to it.
Is there anybody else having identical RSS issues? Anyone who knows the solution can you kindly respond?
Thanks!!
Neat blog! Is your theme custom made or did you download it from somewhere?
A theme like yours with a few simple tweeks would really make my blog stand out.
Please let me know where you got your theme. Many thanks
The Zune concentrates on being a Portable Media Player. Not a web browser. Not a game machine. Maybe in the future it’ll do even better in those areas, but for now it’s a fantastic way to organize and listen to your music and videos, and is without peer in that regard. The iPod’s strengths are its web browsing and apps. If those sound more compelling, perhaps it is your best choice.
Hi there, yup this article is genuinely good and I
have learned lot of things from it concerning blogging.
thanks.
You’re so interesting! I do not suppose I have read through
a single thing like this before. So nice to discover someone with a few genuine thoughts
on this topic. Really.. many thanks for starting this
up. This site is one thing that’s needed on the internet, someone with a little originality!
Hello there, You’ve performed an excellent job. I’ll certainly digg it and personally recommend to
my friends. I am confident they will be benefited from
this site.
I pay a quick visit day-to-day a few blogs and information sites to
read posts, except this webpage presents quality based writing.
Fantastic items from you, man. I’ve remember your stuff prior to and you are simply extremely wonderful.
I actually like what you have obtained right
here, certainly like what you’re stating and the best way
through which you assert it. You’re making it entertaining
and you still take care of to stay it smart. I can not wait to read much more from you.
This is actually a great website.