Sorry, it’s been longer than expected. I’ve had a few setbacks, if you’re a regular reader you’re aware of my “EYE PROBLEM“ and my broken coupler… *sigh* But we’re back in business now, folks. Hope all you mommies had a wonderful Mother’s Day. Now let’s get back down to business.
I’m really glad that part one of the frosting tutorial was a success, and that people found it helpful. Here’s where we get into the real stuff, though: piping using a pastry bag and frosting using an offset spatula. I’ll be frosting these using three different tips, as well as telling you how to use the tips, fill the bags, and pipe the frosting so it looks super pretty. I made cupcakes especially for this occasion (well, and for Mother’s Day), they’re lemon cupcakes with a light lemon buttercream, and I topped them with raspberries. If you’d like to make them as well, the recipe and all credits for it and the liners, etc will be at the very end of the post. Boy, it felt good to make some cupcakes again! I hadn’t made any since my Fluffernutter cupcakes from April 15th.. that’s a month ago. A month without cupcakes, how sad. Anyway here’s what the finished products looked like:
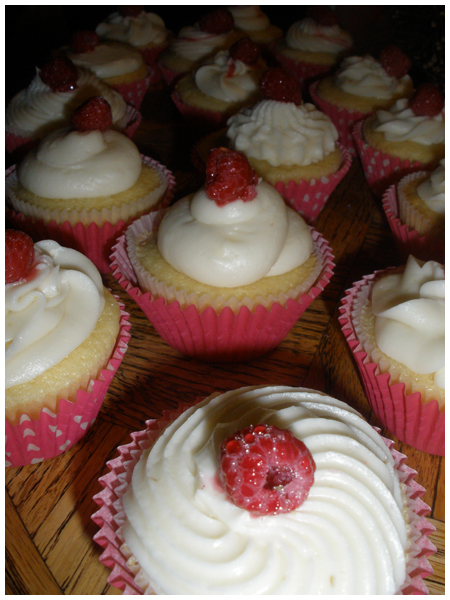 Pretty, aren’t they?
…
I’ll say this again: I am not a professional. There are people out there with much better techniques than I, I’m sure, for frosting cupcakes. I don’t think I’m all that and a bag of semi-sweet chocolate chips, believe me. But people asked me to do this, so I am, because I want to help them out. However please don’t take this to mean I’m conceited and think I’m a pastry chef or anything. I’m just a regular chick, with a regular kitchen, who likes to bake and happens to be sorta good at it. And if by sharing my tips, tricks and cheats I can help a few other people get in touch with their inner Francois Payard, then by all means… I just don’t want anyone thinking I’m walking around looking for accolades on my frosting techniques.
First of all, the following Wilton materials will be used in this tutorial:
- 16″ pastry bag

 – I recommend this size because it holds enough frosting for at least 24 cupcakes without having to refill
 - disposable pastry bags – definitely needed if you’re using colored frostings, they’ll dye your polyester reusable bags something fierce, you can also use these instead of reusable bags, despite the horrible effect they probably have on the environment, it saves time: instead of washing ‘em, you toss ‘em
- large coupler – this is what you use to attach the tips to the bags.. duh… although when using disposable bags, this isn’t needed
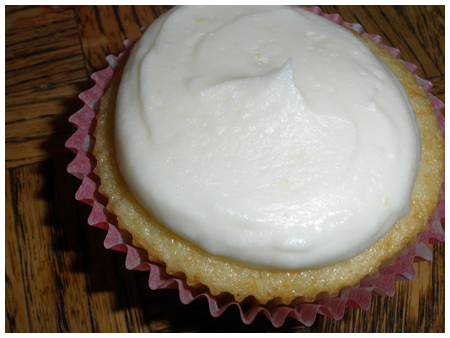
- offset spatula – important for frosting cupcakes that you don’t want to pipe, or for creating smooth tops on them, like this
- 1A tip (large round) – this tip makes the frosting look like these examples: one – two – three (also it’s good for piping on frosting before you spread it out with an offset spatula, like this)
- 1M tip / #2110 (large star) – this tip makes the frosting look like these examples: one – two – three
- 4B tip (open star) – this tip is also known in some brands as a “french star”… I just got it so I don’t have any examples to show you other than the cupcakes I’ll be frosting today
To begin, we’re going to get our bags ready. We already made our frosting and covered how to make it pipable in the last post. So here I’ll show you how to fill and use a reusable bag as well as a disposable. To use a reusable bag, first you have to put the coupler base in the bag. If you haven’t already cut your bag, you’ll have to do that before you do anything else. To cut the bag, you have to first push the coupler base as far down into the bag as you can. Then, using a pen or pencil, mark the bag where the bottom screw thread is outlined against the bag material. Push the coupler base back out of your bag, cut the bag on the mark, and push the base back in. It should fit perfectly. Now put the tip on, and then screw the coupler ring over the tip. It should fit snugly, and not be wobbly or uneven. I can’t show you pictures of this because I cut mine a long time ago, but it should be fairly self-explanatory. To prepare a disposable bag, when marking the spot on the outside of the bag, do it about a ¼ of an inch below that screw thread line. You don’t have to use a coupler for disposable bags- I never do. I won’t be doing so in this tutorial either, but if it makes you feel more comfortable, you can use one.
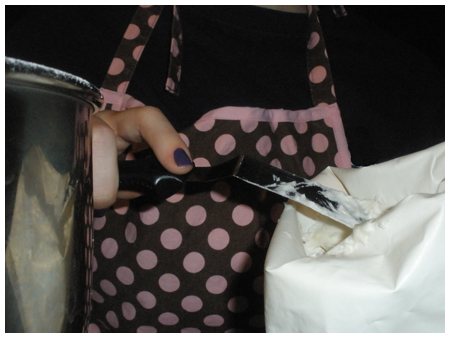 Filling a reusable bag with an offset spatula…
…
To fill the bag, you have two options. Option one is the way Wilton will tell you to do it: hold the bag in one hand, and fold the top over to form a large “cuff.” With an angled spatula or silicone spatula, fill the bag with about ½ – 1½ cups frosting. The second way to do it is to use a drinking glass to hold the bag. Then fold it over to form the cuff, and fill it, lifting the bag up and shaking it slightly every so often so that the frosting works it’s way down to the tip. When you’ve filled it enough, close the bag by unfolding the cuff and twisting it closed, forcing the frosting down into the bag further. This prevents “frosting farts”; aka when you think you’ve filled the bag and didn’t push it down enough, so when you try and pipe frosting on your cakes, a bit comes out, then stops, and when you push the frosting comes “farting” out with an obnoxious sound and splattering itself all over the top of your cupcake. This can also happen when your bag is running low on frosting, so make sure you’re aware of how much you have in there.
Once you have your bag filled and ready, position your tip over the cupcake. Depending on the look you’re going for, and the tip you’re using, you can either do a straight pipe or a circular pipe. A straight pipe is when you hold the bag directly perpendicular to the cupcake, place the tip against the cake, and slightly push on the frosting bag. Continue pushing until the frosting “blooms” out large enough, while lifting the bag upwards. When you’re finished, do a final little push into the frosting while doing one last little squeeze on the bag. Then just lift it away. Ta-da! This looks awesome with a large round tip when using meringue type frosting, but for these purposes I used the 1A tip to frost and then smoothed it with an offset spatula. This, like anything else, requires an amount of practice. The 1M star tip also makes a nice look when used like this.


 Using a disposable bag there, as you can see
…
Another way to pipe is the circular pipe. To do this, you place your tip over the cupcake much in the same way as previously stated. Instead of pushing down in one spot in the center of the cake, however, you push down a little ways away from the center, and go in a circle, pushing the frosting out of the bag all the while… making a coil. Usually, I try not to go around more than once or twice, ending with a pretty point on the top (ending in the same fashion as above: doing a final little push into the frosting while doing one last little squeeze on the bag, then quickly releasing pressure and lifting the bag away). But depending on how thick your frosting is and how steady your hands are, it’s possible to go 3-4 times around. Also, try making circles if your coils don’t work. Make a larger circle, then a smaller one on top, then finish it with a “dollop” on top of that. It has the same look, especially when using a round tip, but easier to try and get the hang of. All three tips I used today can be used in this way, as well as tip 2A.


 ….
….
While I’m frosting I find it helpful to listen to music or have a DVD on of a movie I like. I find that listening to Lady Gaga & Beyonce sing ‘Telephone’ or something makes it not only more fun but helps me get into a “zone” of sorts. Though depending on the type of cupcakes or dessert I’m making, different music is in order. These cupcakes just made me think of Nicki Minaj & her “Harajuku Barbie”-ness, but sometimes Green Day, Black Sabbath or Social Distortion and even Method Man, Mos Def or Lil’ Kim is necessary. Movies with a lot of awesome music make for good frosting assistants too- for example, Quentin Tarantino movies, biopic movies on musical artists, etc. Find your groove and rock out while frosting. I promise you, it helps!
I thought I’d show you all how they came out, and maybe seeing the differently frosted finished products would also help you in your frosting efforts. The tips used, in order, are: 4B, 1A, 1M and 1A that I then spread out with the offset spatula.


…
The main thing to remember is practice really makes perfect when it comes to frosting. As long as your frosting is the right consistency, you’re on the right path. Just attempting these things over and over again will let you work out, through trial and error, the best way of doing it for you. Just practice, you can even practice your technique on paper plates until you get the hang of it.
Of course, Lola got jealous of all the equipment and stuff being photographed, and she wanted some face-time too. She’s such a camera whore. But it’s allright, she’s beautiful. She deserves to be seen.

LEMON CUPCAKES (tweaked from original cupcake & frosting recipes courtesy of ourbestbites.com)
Ingredients:
- 1 ½ cups (3 sticks) of unsalted butter, softened
- 3 cups cake flour
- 1 tsp. baking powder
- ½ tsp. salt
- ½ tsp. baking soda
- 2 cups sugar
- 5 large eggs
- 2 tsp. vanilla extract
- 4 tablespoons freshly squeezed lemon juice
- Zest of 2 lemons (just zest the other lemons before you squeeze them)
- 1 cup buttermilk
Directions:
- Preheat oven to 325 degrees F. Line 2 12-cup muffin tins with cupcake liners.
- In the bowl of an electric mixer fitted with the paddle attachment, beat butter and sugar on medium speed until light and fluffy, 4-5 minutes. Don’t go skimping here–you want the mixture to be almost white and super fluffy. This is absolutely essential to the outcome of the cake.
- While butter and sugar are mixing, sift together flour, baking powder, salt, and baking soda in a medium bowl. Set aside. After butter and sugar have mixed sufficiently, With the mixer running, add eggs, one at a time, beating to incorporate after each addition. Beat in vanilla, lemon juice, and lemon zest.
- With mixer on low speed, alternate adding flour mixture and buttermilk, beginning and ending with the flour mixture and beating until fully incorporated.
- Fill the liners with the batter. DO NOT FILL THEM TOO HIGH. They will rise, and rise, and rise. Be super conservative. These cupcakes won’t have a nice, curvy crown, but that’s okay–no one will ever know or care. However, they will rise like you have no idea. A tablespoon of batter might be just right, but do a test run or two to make sure.
- Bake about 20-25 minutes or just until a toothpick inserted into the center of one of the cupcakes comes out clean. You don’t want to overbake these even a bit, or they’ll start to lose their delicious moisture. Remove from oven and cool completely.
LIGHT LEMON BUTTERCREAM
Ingredients:
- 1 ¼ cups butter (2 ½ sticks)
- 2 tsp. grated lemon rind
- 1 tablespoon vanilla
- 2-3 tablespoons milk
- 3 cups powdered sugar
Directions:
- Beat butter, lemon rind, and vanilla in an electric mixer until creamy.
- Gradually add powdered sugar, beating to spreading consistency. Makes 2 ¾ cups frosting.
I used pink polka dot and pink solid liners from sweet estelle’s baking supply and topped the cupcakes with frozen raspberries that I defrosted, then laid out on a paper towel and sprinkled with sugar, then let rest a while before putting them on the cakes. By all means if you want to use fresh raspberries you can, I just used all mine up in the pie and had happened to have some frozen ones in the freezer. After a few minutes on top of the cupcakes, the raspberries leak a little bit of juice, and it looks pretty when traveling down the rivets of the frosting. I halved the recipe and I got about 18 cupcakes, so keep that in mind. Also, DON’T TRY THIS RECIPE WITH ALL-PURPOSE FLOUR. Only use cake flour for this. And trust me on what I said in the recipe about them rising. I’ve made them twice so far, and the first time I listened to the recipe author’s advice to fill the liners up to almost the top… and it was disastrous. Cupcake batter overflowing everywhere. So really, trust me on this, fill them halfway (if that, even) and do a trial run or a test cupcake to make sure.
I hope this tutorial helps you, and if you have any questions, feel free to comment and I’ll answer them best I can. Or, alternately, if you have any tips I didn’t list here, feel free to add those in the comments as well so everyone can benefit. And if there is any other topic you’d like me to cover, please tell me, if enough people want it then I’ll do a part three.
Before I forget… mucho thanks to everyone who made Cupcake Rehab reach the big 231 “likers” this past week on Facebook. Let’s get to 250, shall we?

 I'm Marilla. A 30-something artist, hobby baker, home canning enthusiast, gardener, DIY-er, wife, mommy of a baby boy and dog mom (to another baby boy) from New York.


I like what you guys tend to be up too. Such clever work and coverage!
Keep up the awesome works guys I’ve incorporated you guys to
my own blogroll.
Excellent items from you, man. I’ve bear in mind your stuff prior to and
you are simply extremely great. I actually like what you have acquired right here, really like what you are stating and the way through which you say it.
You are making it entertaining and you still take care of
to keep it smart. I can’t wait to learn far more from
you. That is actually a great web site.
Hello to every one, as I am genuinely eager of reading this webpage’s post to
be updated daily. It consists of nice information.
I used to be able to find good information from your articles.
When some one searches for his vital thing,
therefore he/she wants to be available that in detail, so that thing
is maintained over here.
Some genuinely interesting information, well written and broadly speaking user genial.
I like this blog very much, Its a real nice post to read and obtain information.
Hello, Neat post. There’s an issue along with your site in internet explorer, may test
this? IE nonetheless is the market leader and a big portion of other people will pass over your excellent writing due to this problem.
I got what you mean,saved to fav, very decent
site.
I have been surfing online more than 3 hours lately, yet I by no means found any attention-grabbing article like yours.
It’s lovely worth sufficient for me. In my opinion, if all website owners and bloggers made just right content as you did, the net shall
be much more useful than ever before.
Thank you for sharing your info. I truly appreciate your efforts and I
am waiting for your next post thanks once again.
I really like it when people get together and share thoughts.
Great website, keep it up!
Hi there to every one, the contents existing at this website are in fact awesome for people
knowledge, well, keep up the good work fellows.
Having read this I thought it was extremely enlightening.
I appreciate you spending some time and effort to
put this information together. I once again find
myself spending a lot of time both reading and posting comments.
But so what, it was still worth it!
Some really rattling work on behalf of the owner of this web site, dead
outstanding articles.
Good day very nice site!! Guy .. Excellent ..
Amazing .. I’ll bookmark your site and take the feeds also…I am happy to seek out a lot of
helpful information right here within the put up,
we’d like work out more techniques on this regard, thank you for sharing.
I read this article completely regarding the resemblance
of latest and earlier technologies, it’s awesome article.
Some really interesting information, well written and
broadly speaking user genial.
I read this article completely concerning the resemblance of most recent and previous technologies,
it’s awesome article.
Heya! I just wanted to ask if you ever have any problems with
hackers? My last blog (wordpress) was hacked and I ended
up losing months of hard work due to no back up. Do you have any methods to prevent hackers?
Sorry for the huge review, but I’m really loving the new Zune, and hope this, as well as the excellent reviews some other people have written, will help you decide if it’s the right choice for you.
Generally I do not read post on blogs, however I would like to say
that this write-up very pressured me to check out and do so!
Your writing style has been amazed me. Thanks,
very great article.
There’s definately a great deal to know about this subject.
I really like all the points you made.
Hi there everyone, it’s my first pay a quick visit at this site,
and piece of writing is in fact fruitful in support of me, keep up
posting these types of posts.
I will right away grab your rss as I can’t in finding your e-mail subscription hyperlink or e-newsletter service.
Do you’ve any? Kindly allow me recognize in order that I
could subscribe. Thanks.
Every weekend i used to pay a quick visit this web
site, as i want enjoyment, for the reason that this this website conations truly pleasant
funny material too.